Translation
Translagte Strings (with Loco Translate):
To translate theme or plugin strings, you'll need to install the Loco Translate plugin. Go to the Dasboard > Plugins > Add New, search and find "Loco translate", install and activate the plugin.
Now you have loco translate plugin installed and are able to translate theme and plugin strings to the language you want. For this example, we'll translate beehive theme string, but you can also translate plugin string with the same process.
1. Choose a theme/plugin:
Go to Dasboard > Loco Translate > Themes to choose a theme or Dasboard > Loco Translate > Plugins to choose a plugin. It will lead you to the theme/plugin list page as below.

Click on the theme/plugin you want to translate.
1. Choose a language
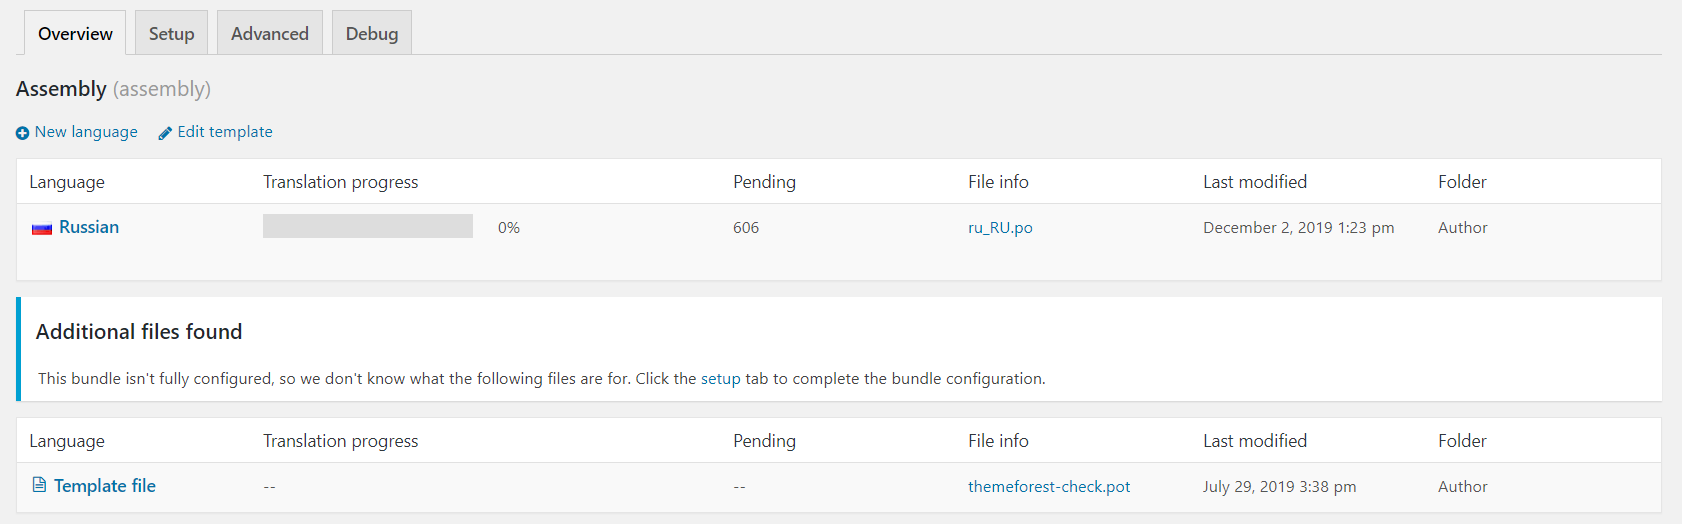
After you choose the theme/plugin, you will be directed to the language page where you will see the list of translated languages like this:
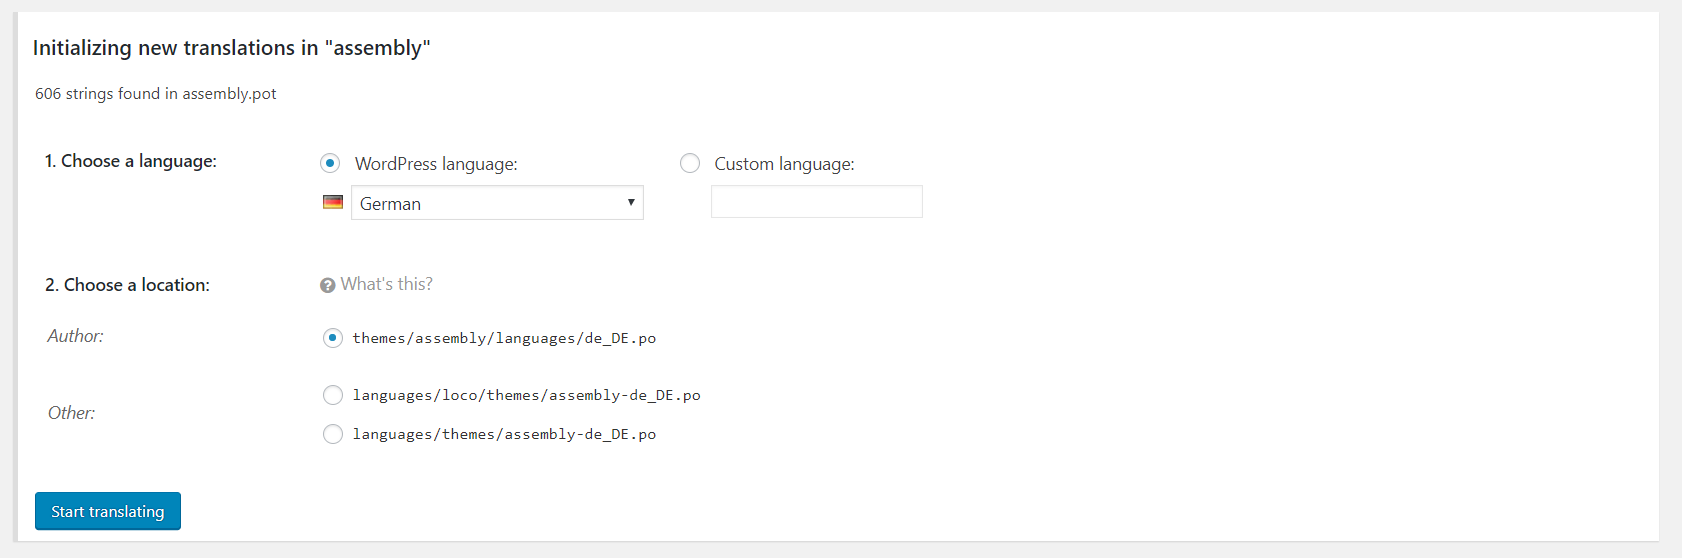
Click on your desired language if it exists in the list. If it doesn't, click on New Language link at the top, add your language from the dropdown and click Start Translating.
3. Start translate
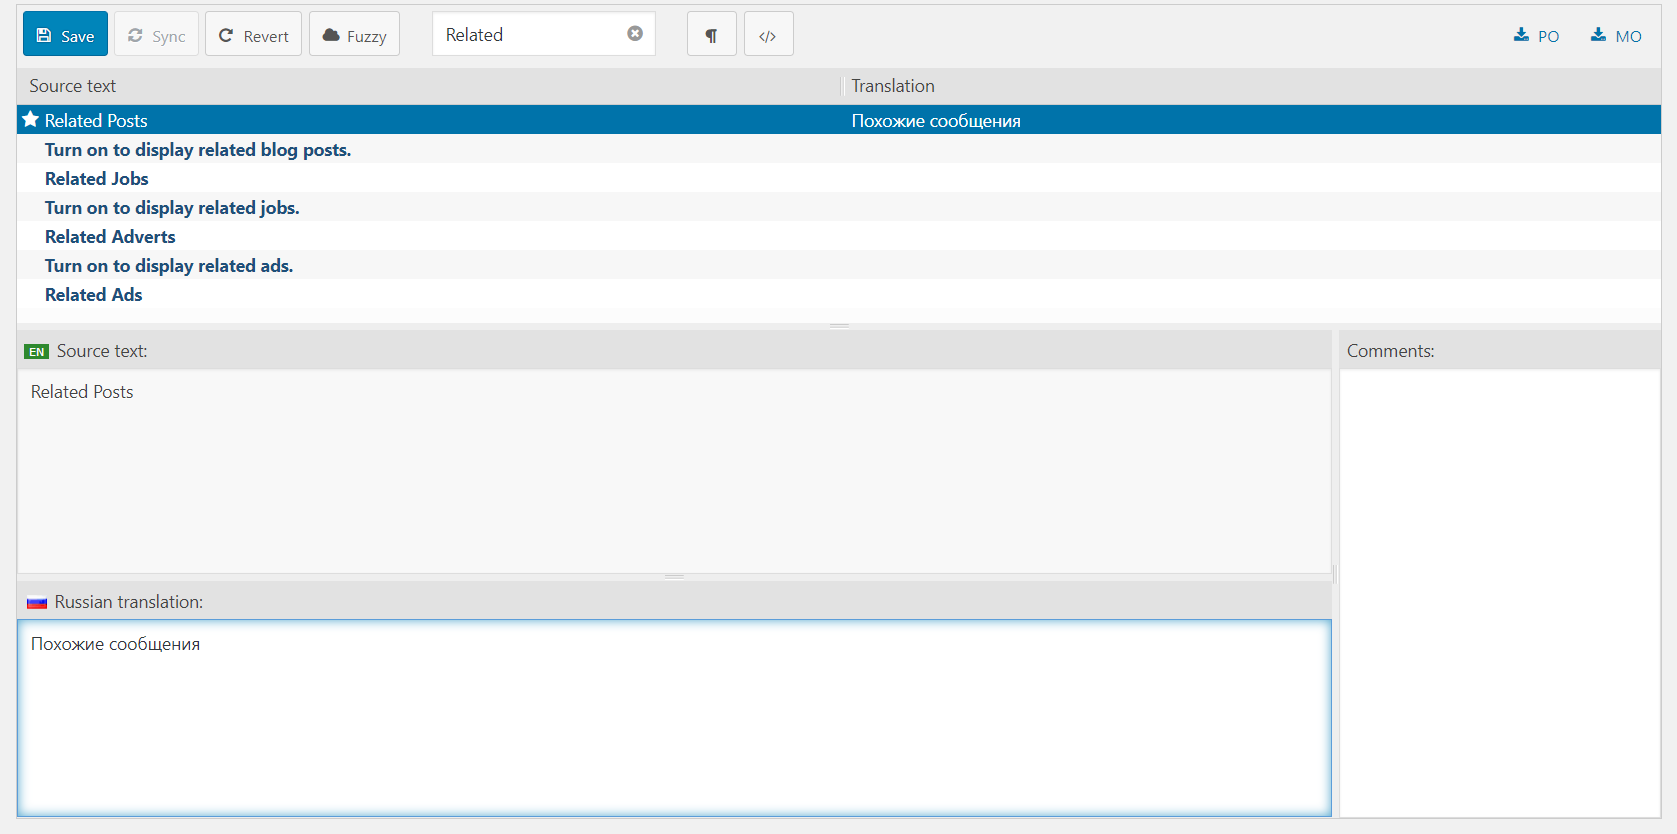
Once you've choosen or added your language, you'll see all the available translatable strings from the theme/plugin, ready to be translated into your language. Let's translate one.
For example, I've translated Related Posts string into Russian. You need to click on save button at the top left corner of the screen after the translation.
The string should be translated. If you've set your language in WordPress dashboard (Dasboard > Settings > General > Site Language), you should be able to see the changes in the front-end. In my case, I translated "Related Posts" to Russian.